
Overview of the Robot Assembly
BLEH
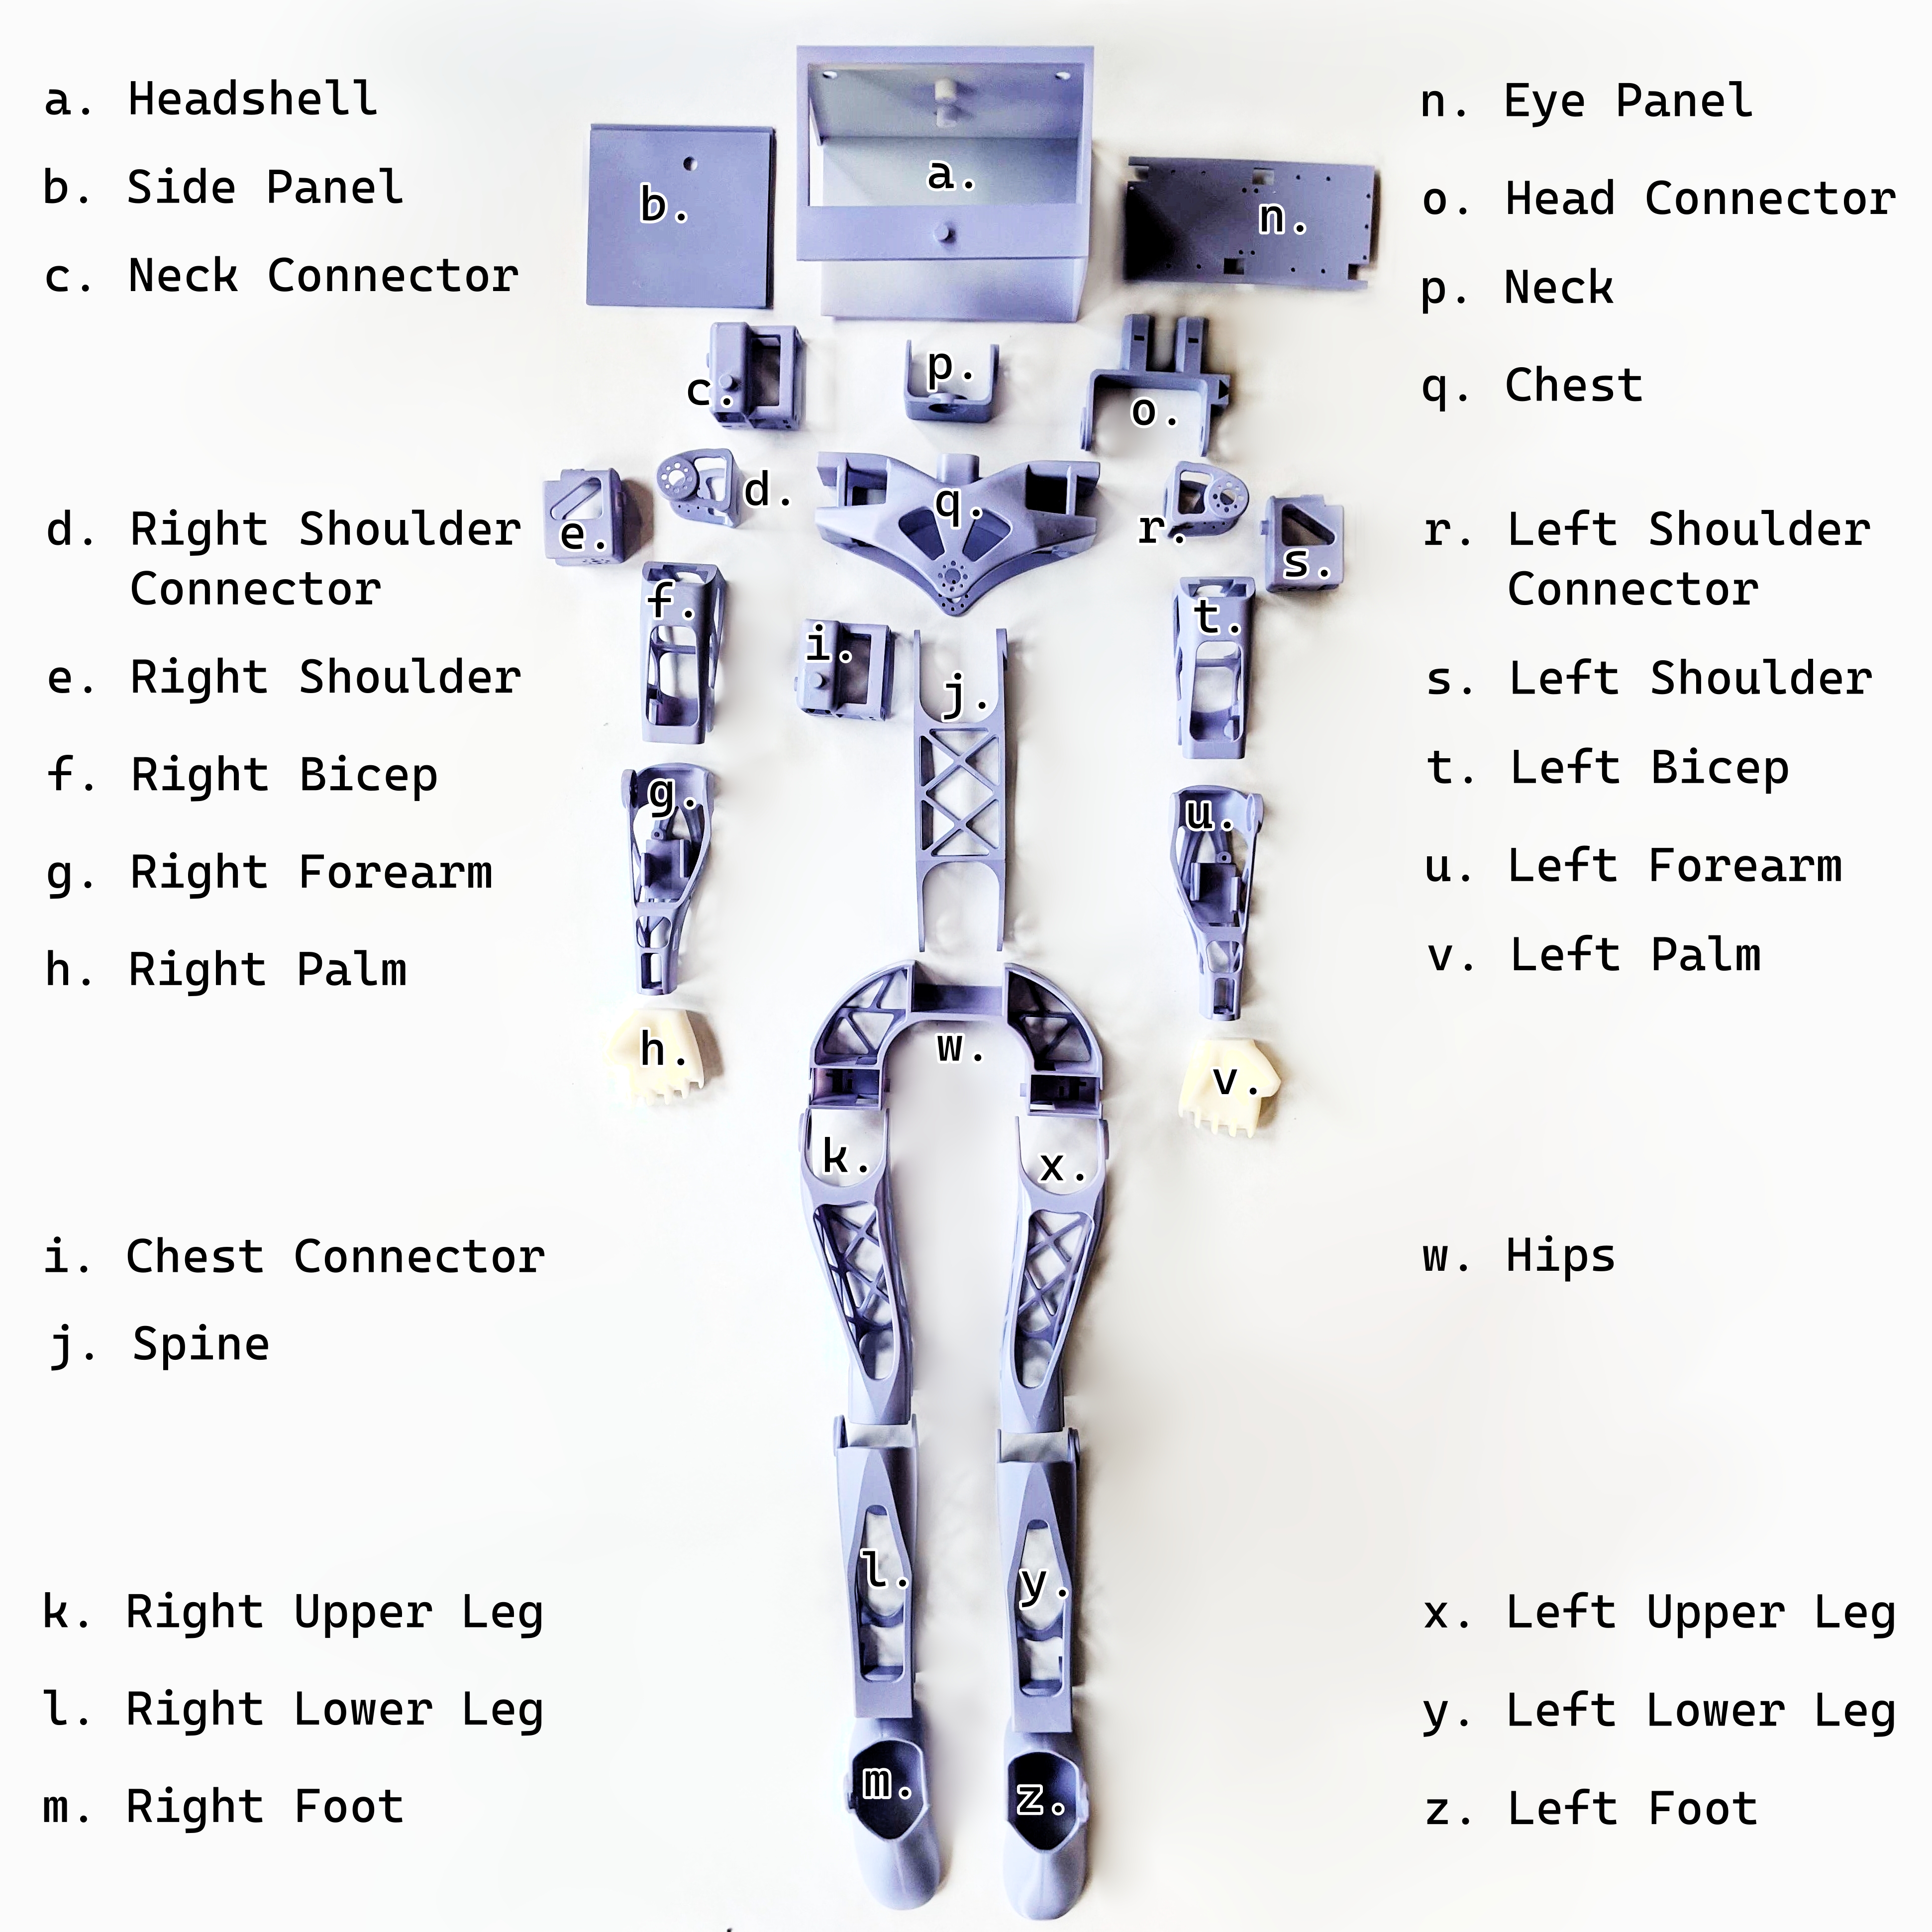
The layout of the parts for the robot, with names that are used within these instructions.
Notes On Assembly Process
Some components are sensitive, or could be easily damaged during assembly. To help mitigate this, these notes are provided as important notes to keep in mind during the process.
Screwing Threading Plastic and Metal
The entire system is largely assembled with machine screws through 3D printed parts, with either lock nuts or captured square nuts as backing. To aid with alignment and minimize cross-threading the nuts or other components, it’s recommended to first screw the machine screws all the way into the 3D printed hole, to thread the plastic and clear any debris from the 3D printing process, before unscrewing the screws, and then assembling the full joint with any nuts, servos, or motor horns screwed in once the plastic holes have been cleared and the screw screws easily into the plastic hole.
Additionally, when screwing to the metal servo horns, it is very easy to misalign your screw and cross thread the screw onto the servo horn. Clearing plastic holes first should allow you to easily hand thread the screw through the plastic into the horn, and simply finish tightening the fully inserted screw down with a hex screwdriver.
Servo Horn Alignment
Once a motor has been set to the default position, you can attach the metal horn with the small indent facing towards the motor body (see below image) as a useful visual reference to assist in verifying that the servo does not get misaligned or shifted during the assembly process.

Servo JST Cables
The JST cables that come with the servos are a very tight fit into the servo recepticals. We recommend only partially inserting them for initial assembly and testing. These partially inserted connectors will still make electrical contact for continuity testing and motor operation, while still providing more space for pliers to pull the header out without touching the wires themselves. Once operation is confirmed, the connectors can easily be pressed the rest of the way in.
Additionally, despite how tight the connectors are into the recepticals, be very careful when disconnecting them to not pull on the cable wires themselves, as this could damage the individual wires or pull them out of the JST header.